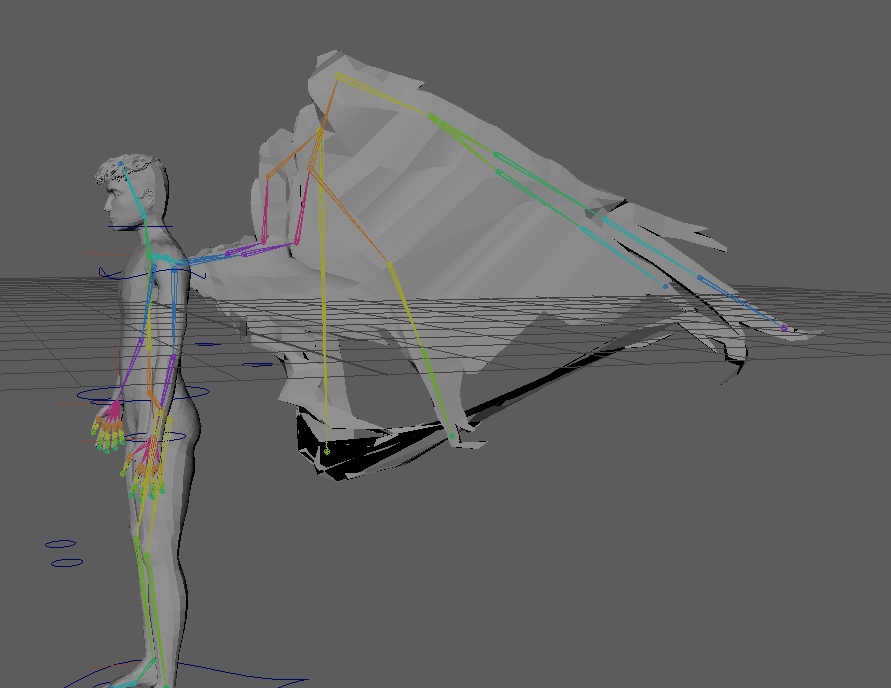
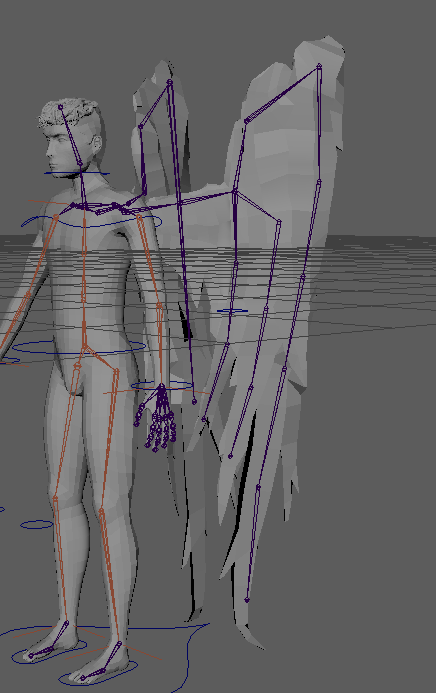
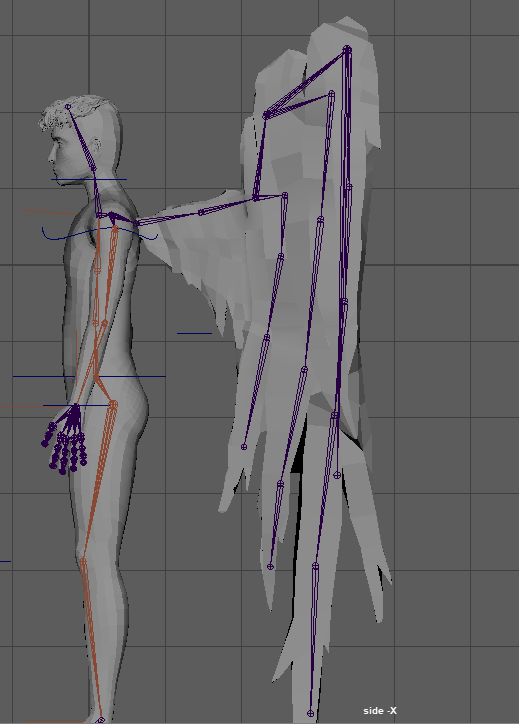
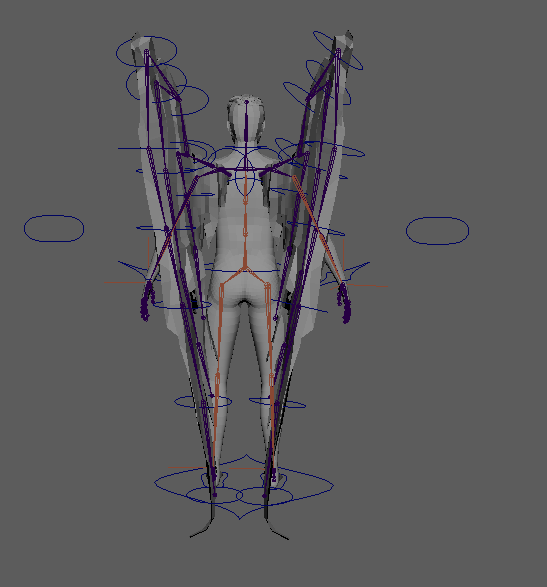
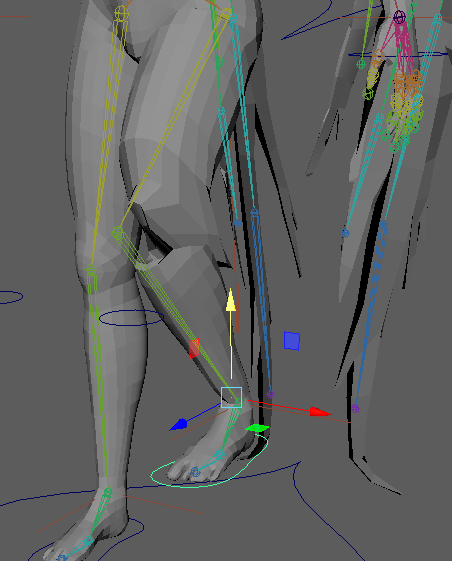
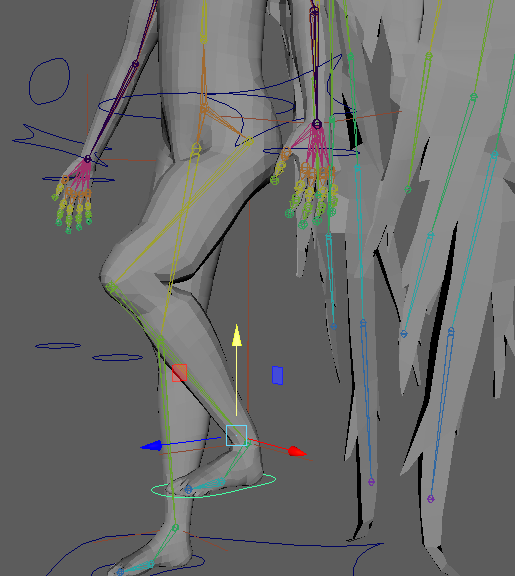
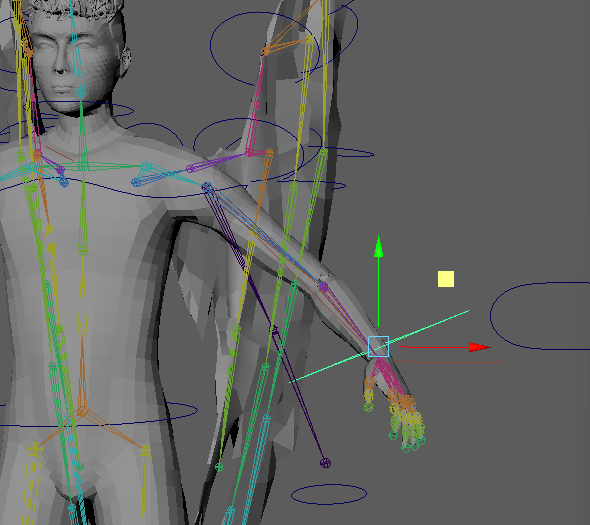
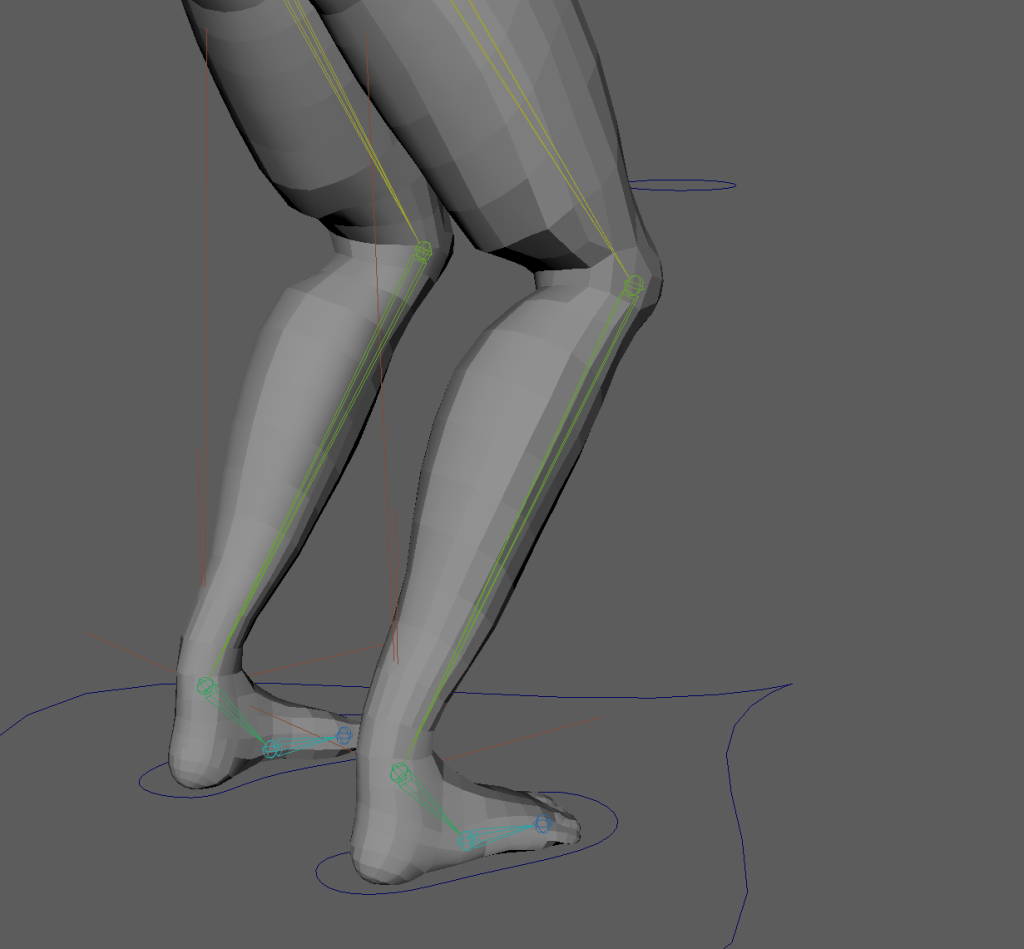
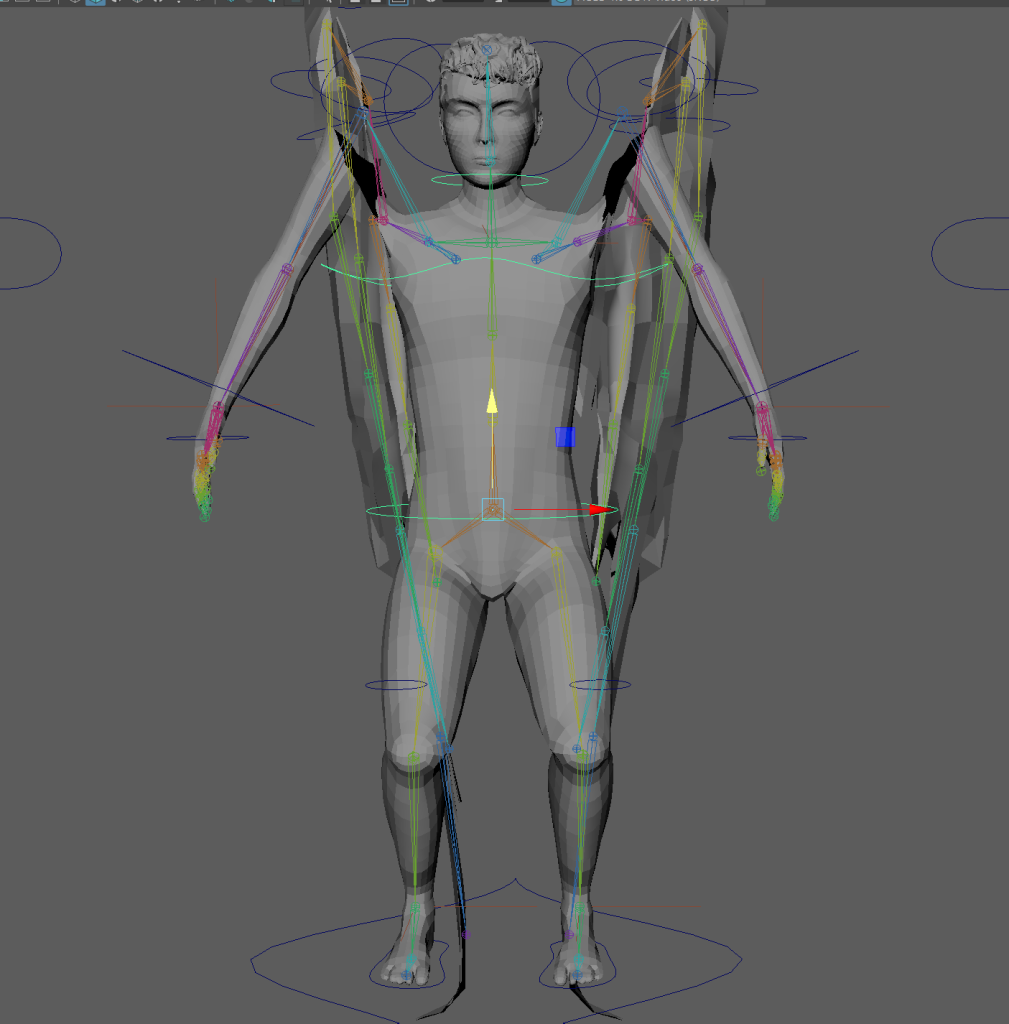
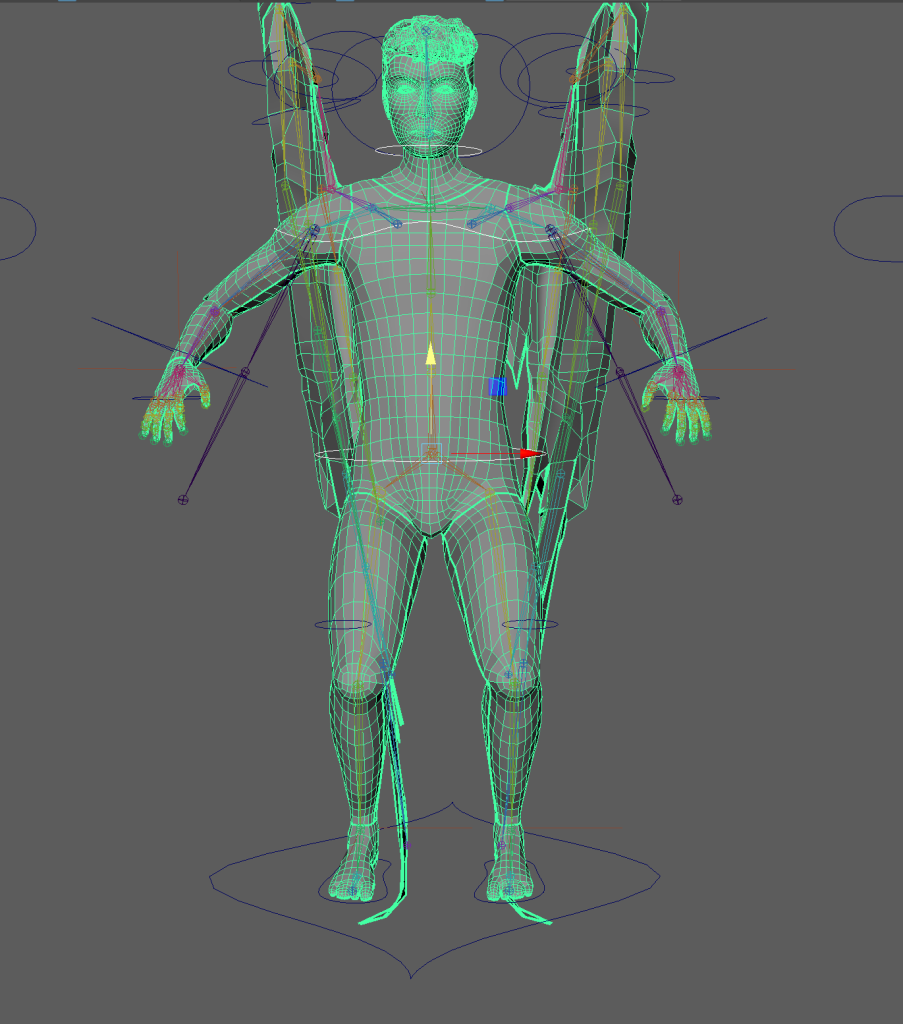
Basic Skeleton

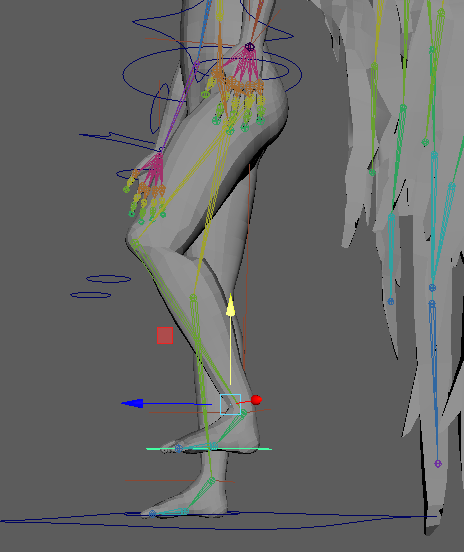
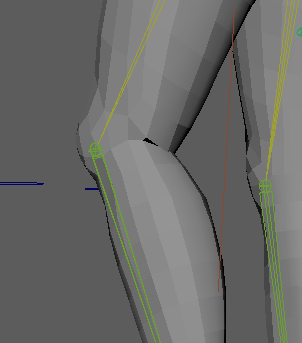
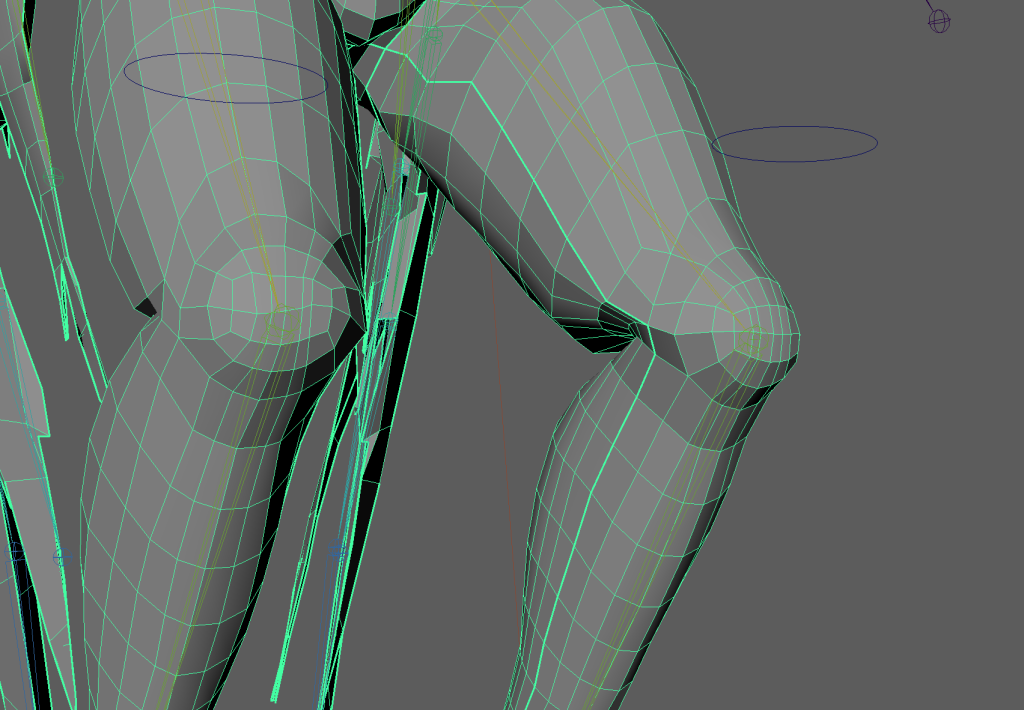
I placed the joints at the knee and elbow closer to the outside of the mesh to allow for more realistic bending after weight painting.
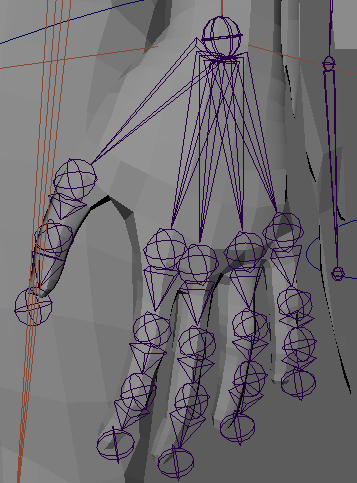
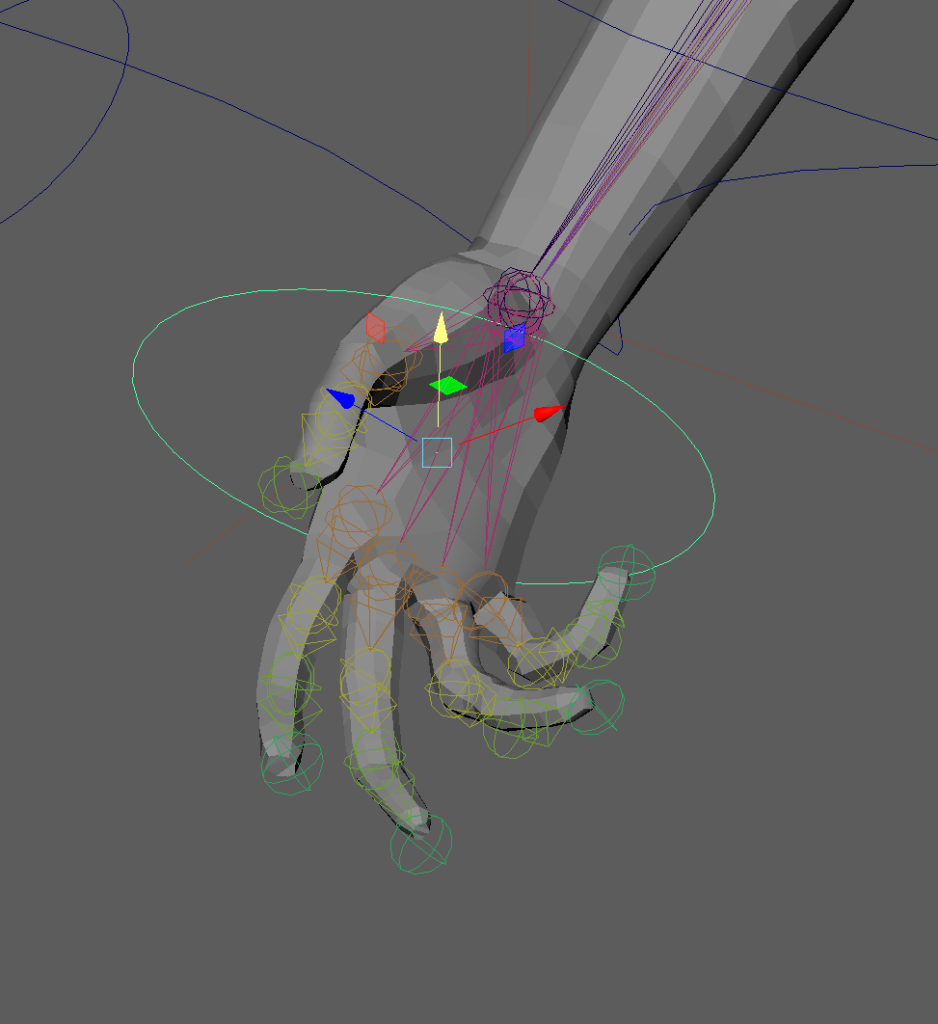
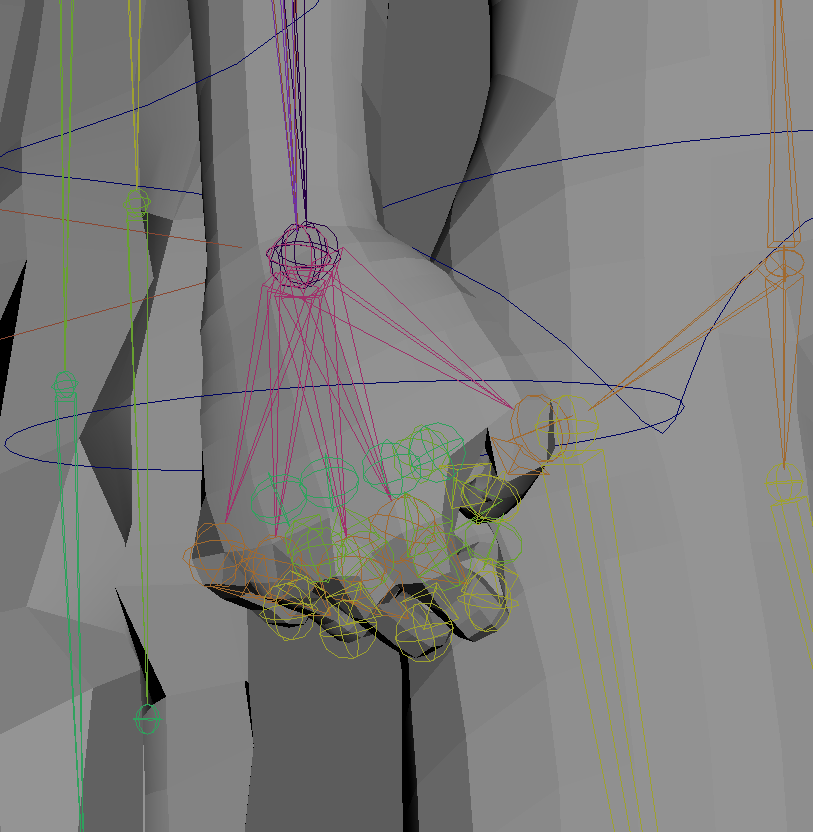
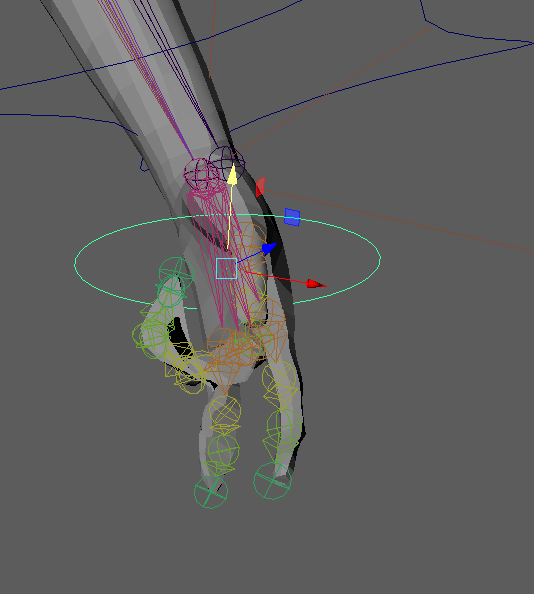
The hand bones I created.
Constraints
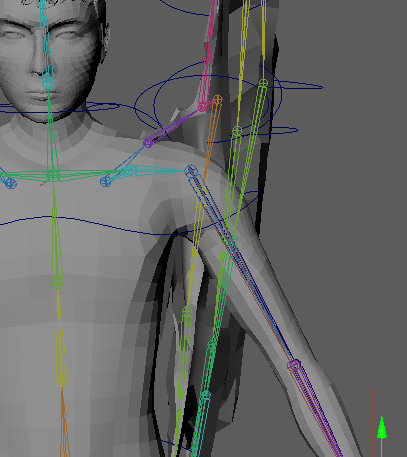
While rigging my character, I used four different types of constraints: point, orient , parent and pole vector.
Point constraints make an object match only the translation of another object. I used point constraints to attach the arm bones to their IK handles.
Orient constraints make an object match the rotation of the object it is constrained to. I used this type of constraining for FK controls for the arms and wings.
Parent constraints is like parenting an object to another, the object will match the translations, rotations and scaling of the object it is constrained to. This is useful for making controls follow the bones above them in FK controls for example constraining the wrist control to the elbow control.
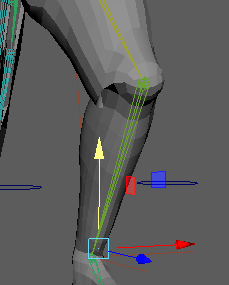
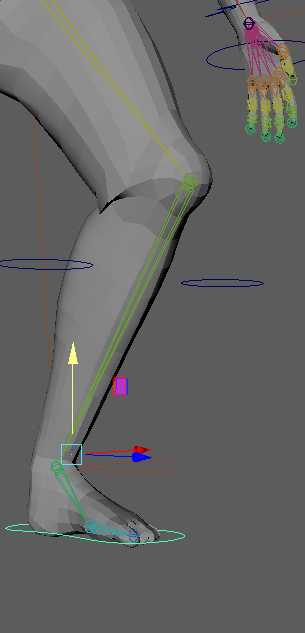
Pole vector constraints control the direction that the middle joint in an IK handle will bend by making it follow an object. This is used to control where elbows and knees point when they bend.


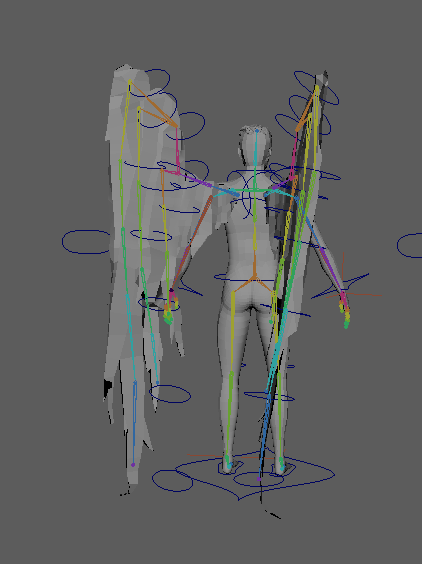
First test for bone placement for the wings rigging. I didn’t use this layout as the bones along the right side of the wing can’t really move independently.
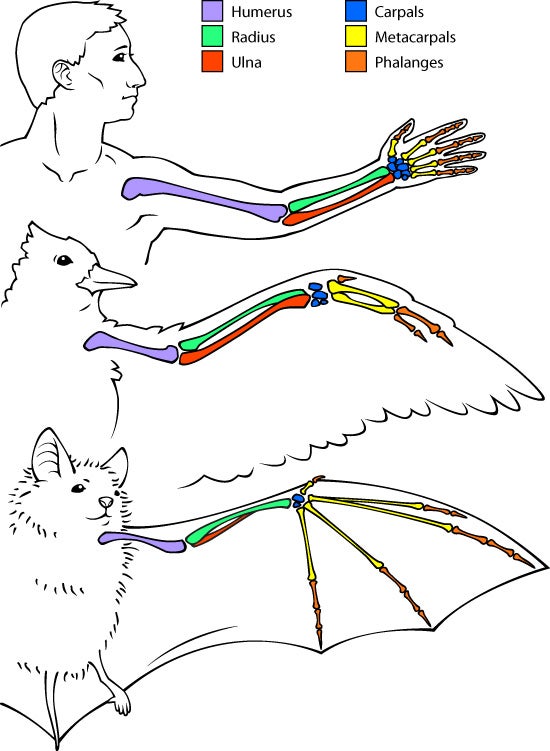

I looked up bat and bird skeletons to help me figure out the best bone placement for natural movement of the wings.
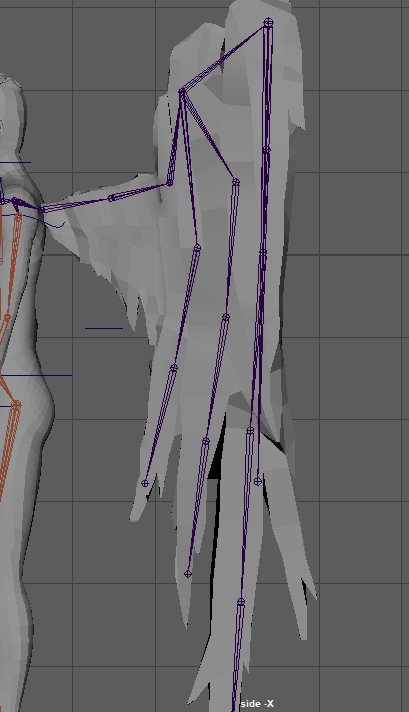
I still didn’t like the bone placement as the different sections of the wings were connecting to the same place and it made the wings move in one chunk.
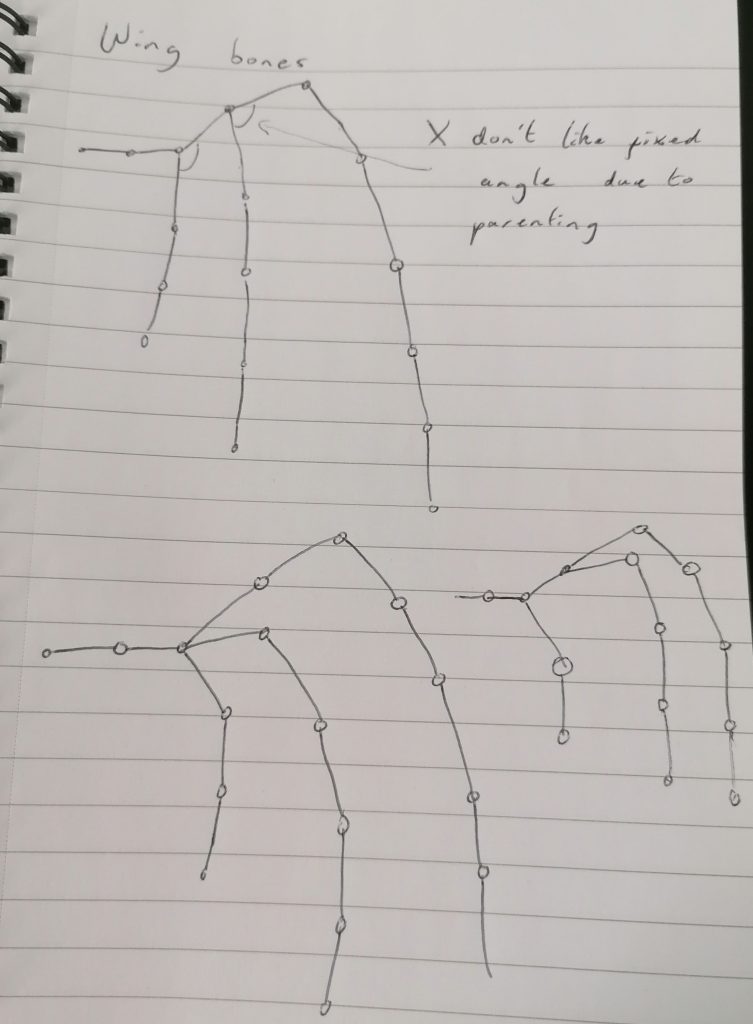
So I sketched a few bone layouts to test.
I didn’t like that the angle between the top two bones was fixed as they were connected to the same joint.
This is another set-up I tested but didn’t like.
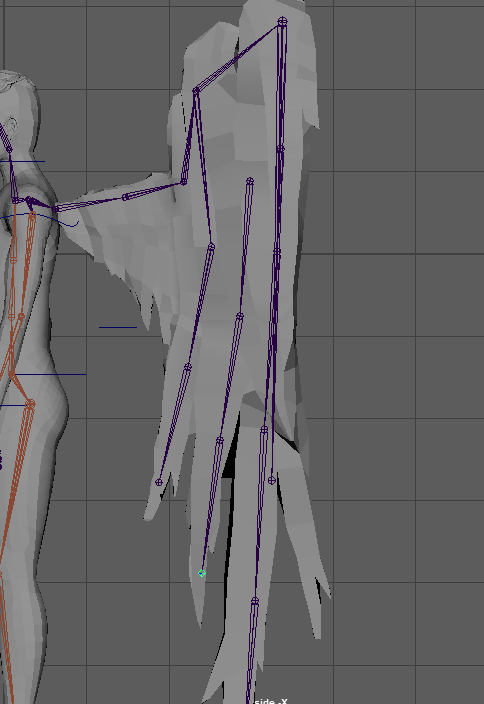
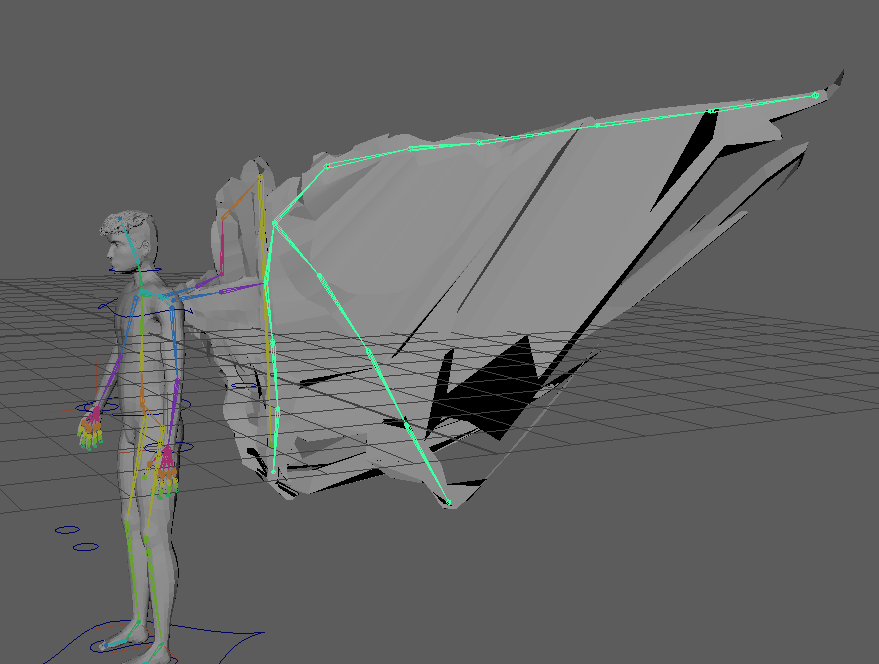
I settled on this layout as I felt it gave me the best control over the wings and moved them in the way I wanted.
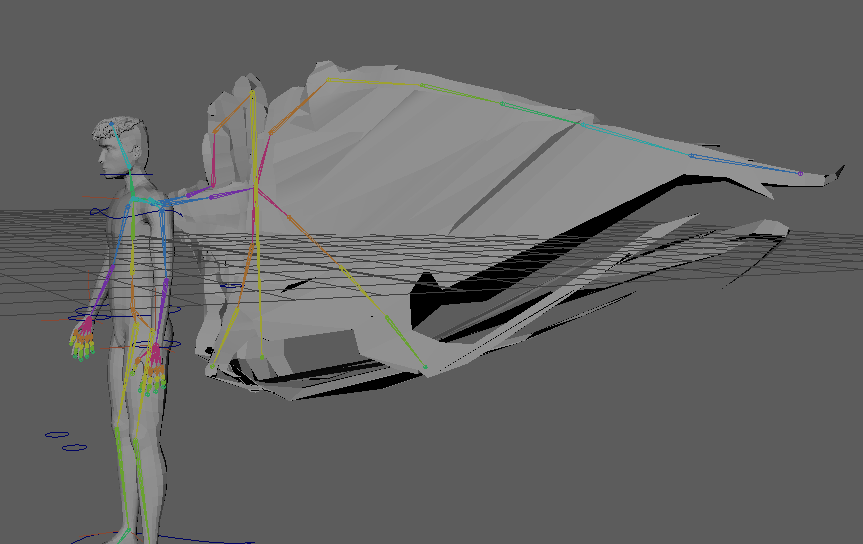
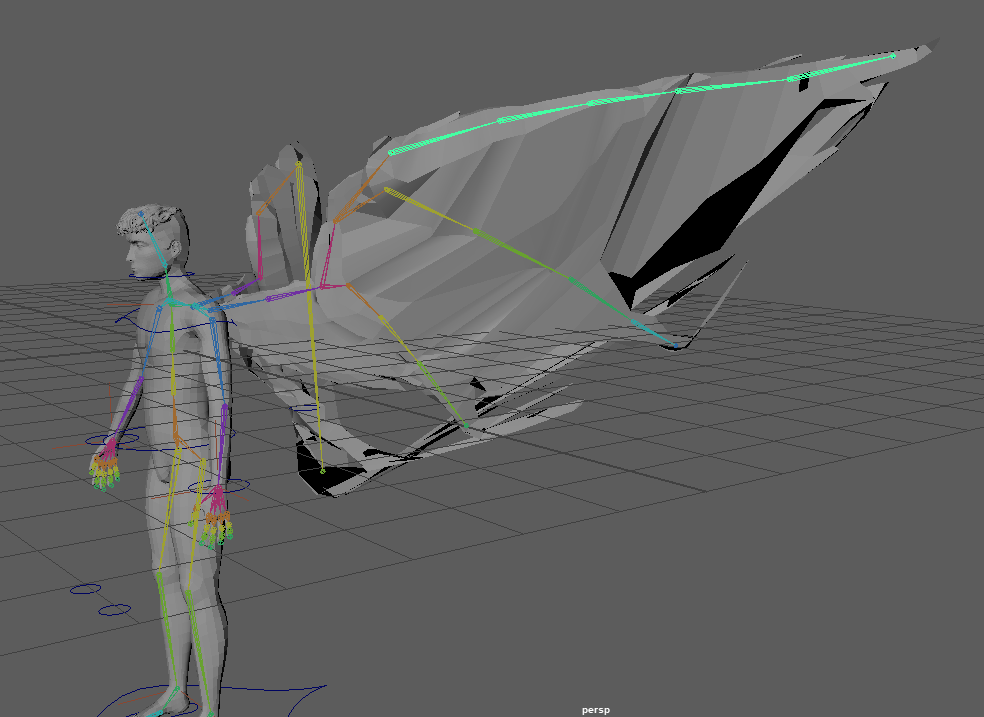
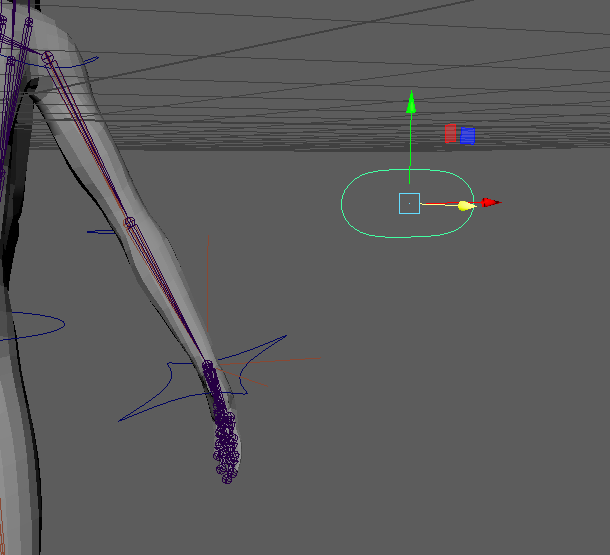
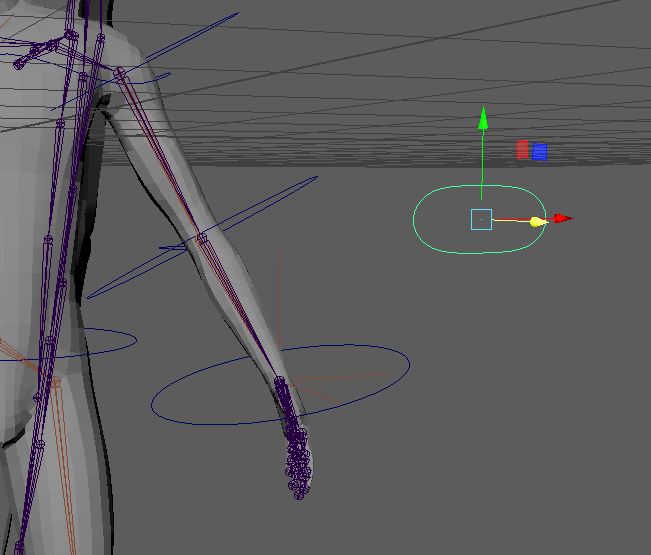
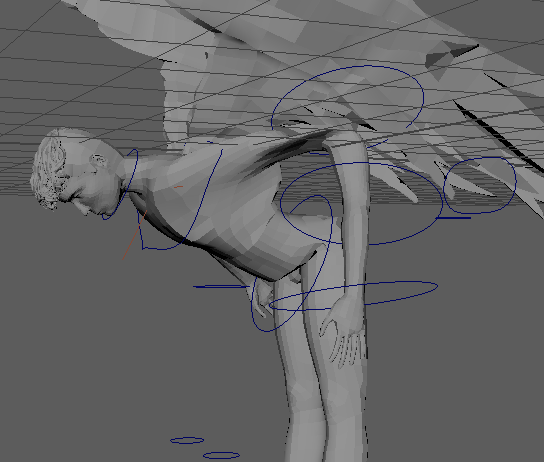
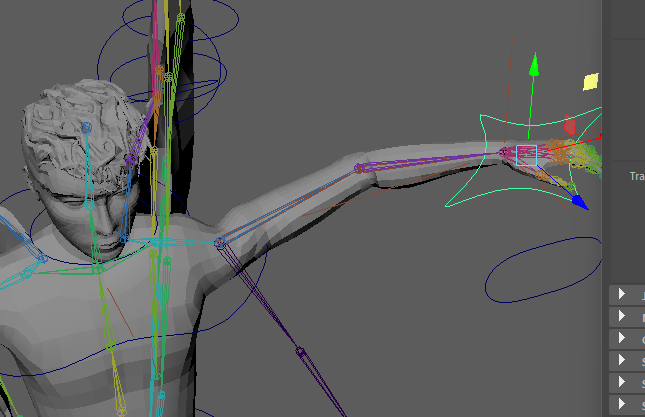
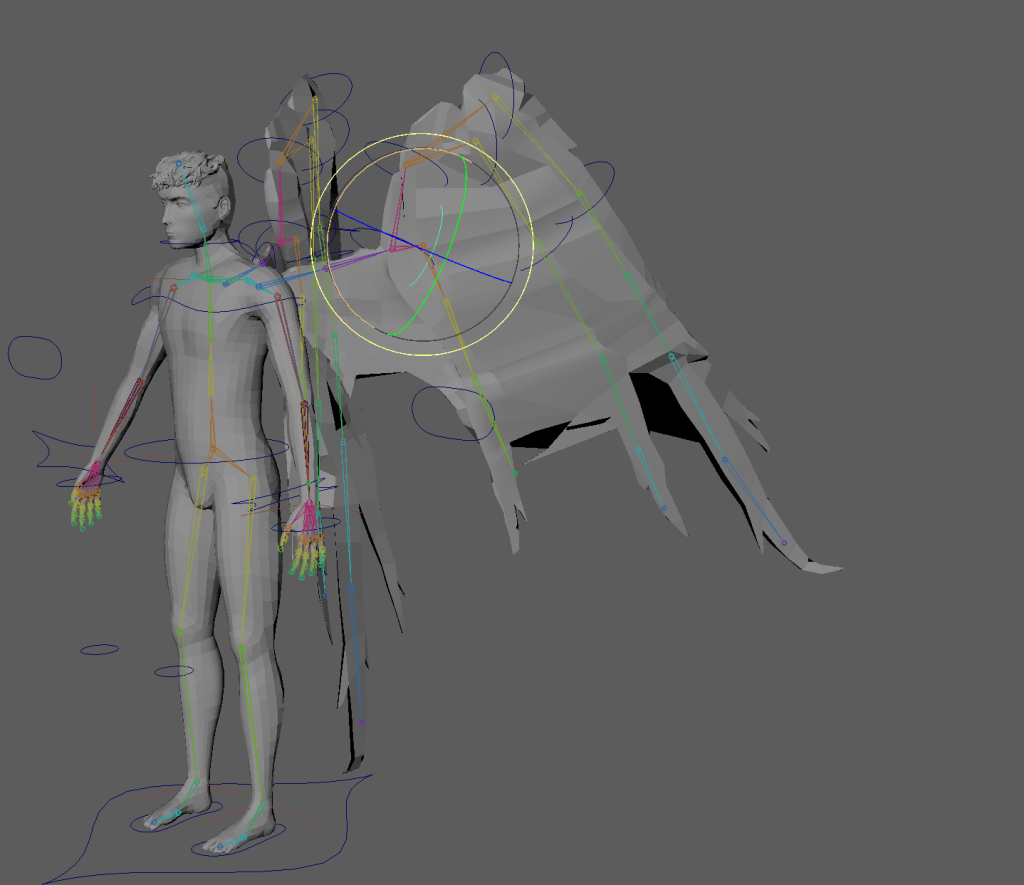
Initial IK Controls
IK/FK Switch controls
IK stands for inverse kinematics when using IK controls you move the character by the end point and the middle point is moved by the computer calculating it; so if you move the hand up the elbow will bend back and up. IK is useful for animating interactions with objects like pushing something.
FK or forward kinematics controls the movement from the top with each joint being parented to the one above it so when you move the shoulder the elbow and wrist move and when you move the elbow the wrist moves. FK is good for creating arcs in animation and can be used to animate arm swing while walking or fluid motions like throwing a ball.
Minor issue when setting up IK/FK with trying to constrain the controls without deleting the parent constrain that was used to align the controls with the joints and prevent the point and orient constraints from working. After deleting the parent constraint they were then able to be constrained the correct way.

Using the node editor to connect the IK/FK switch to the controls so that when the switch is set to 0 the arm will snap to the IK position and using the reverse so that the arm will use the FK position when the switch is set to the opposite.
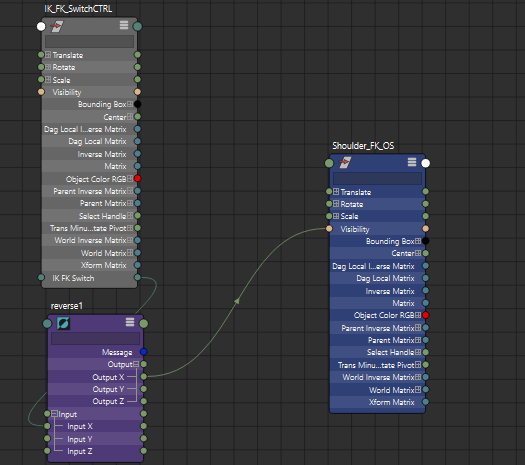
Plugging in the visibility so that the rig that is controlling the arm is the only one that is visible.
IK/FK switch controls are only really necessary in the arms because legs are in contact with the ground most of the time so they won’t be swinging; although my character will fly in one of the animations I’ve planned, I don’t want the legs to swing during it so I am not going to add FK controls to the legs.
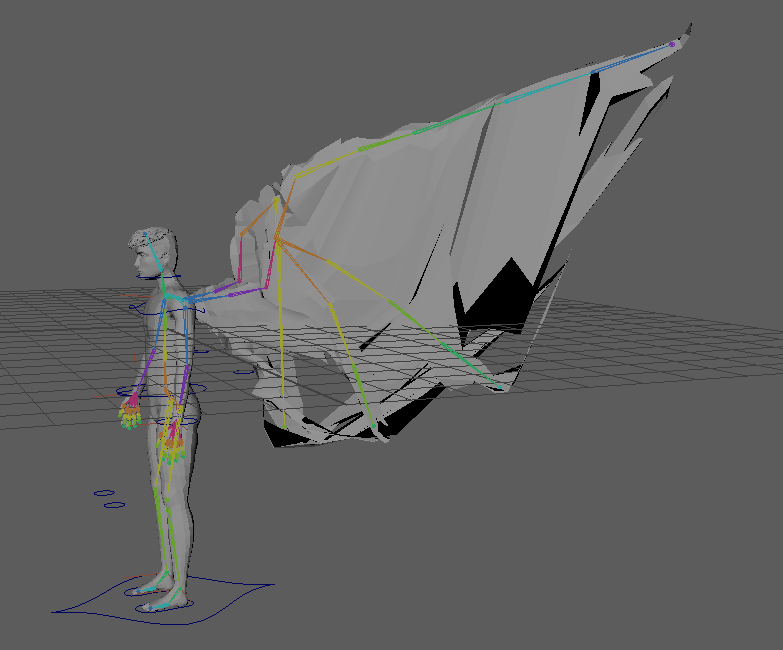
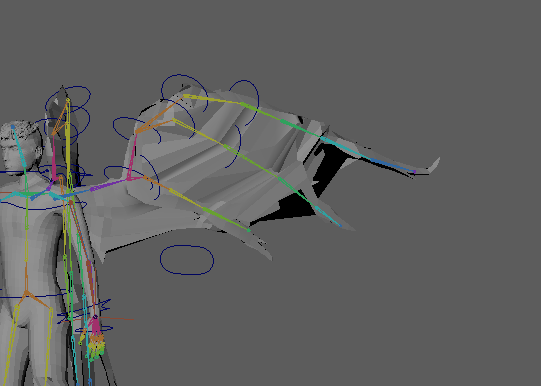
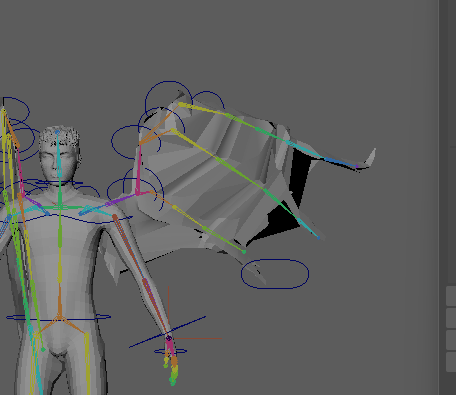
Rigging the wings
I decided to use FK rigging for the wings to get better arcs in the movement and have it look more realistic.
The wing controls don’t stay on bones so I think there must be an issue with the parenting.
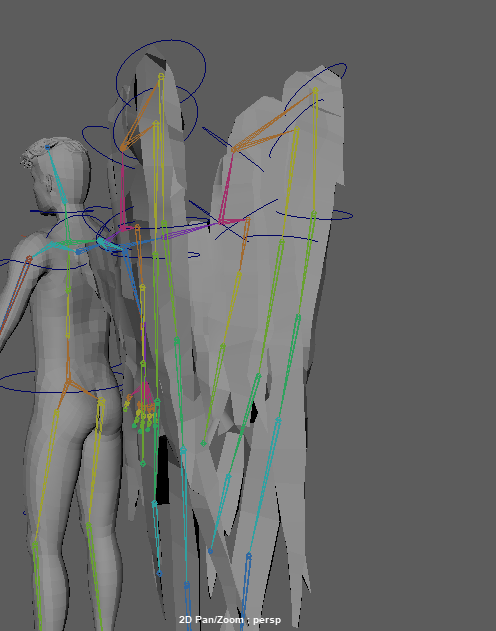
Redone wing controls after issues with parenting and constraint order.
blend shapes? NO only for faces
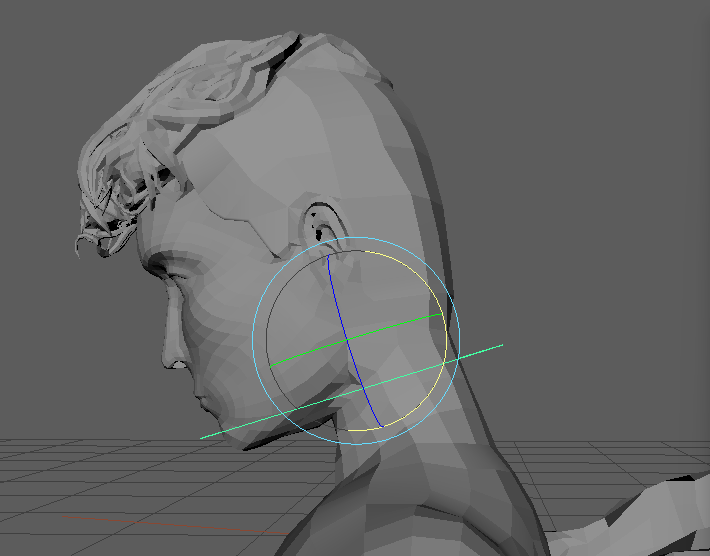
Driven keys for hands
I set up driven keys for the hands by following a tutorial (Banks, M., 2016). Add attributes to channel box editor – I added one for each finger. Use animation editor to set driven keys
Set it to min (0) and key with it with the hand open then set it to the max value (10) and key it with the hand clenched in a fist. Maya then interpolates the positions for the values in between.
Since my rotate controls don’t align perfectly with bones, I’m using the perspective based rotation and keying all the rotate values so I don’t have to redo the bones to make the rotation align with the controls.
An error I made was moving the bones before changing the value on the hand control and then changing after adjusting the finger position which reset the finger position and meant i had to move it again.
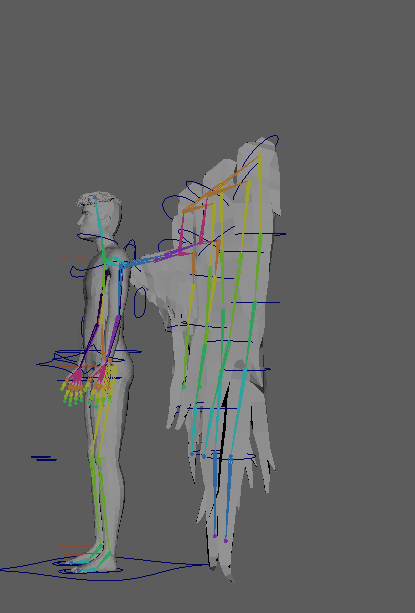
Extra wings
Added driven keys to the wrist to be able to control wrist angle while using IK controls but it overwrote the FK controls so I had to delete the parent constrain and reparent it.
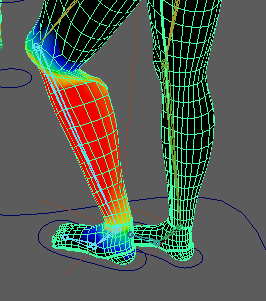
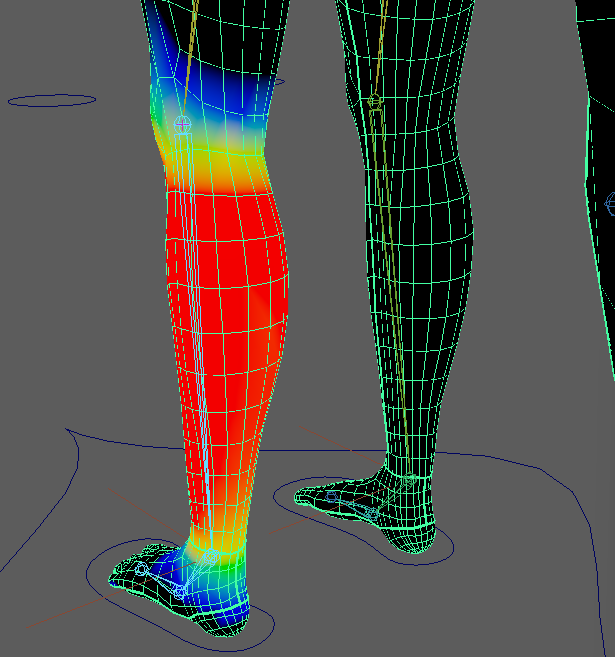
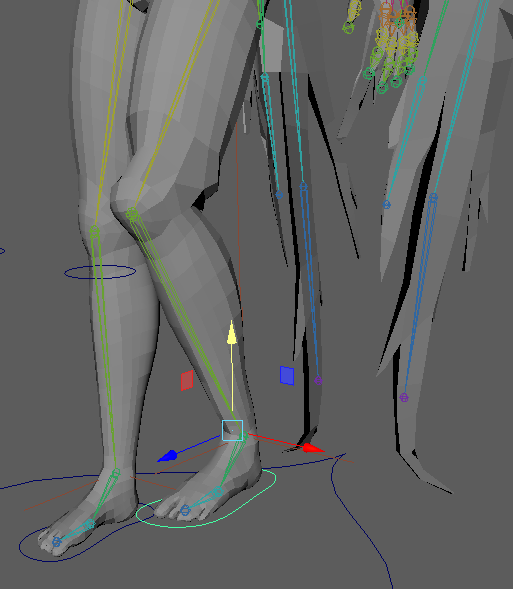
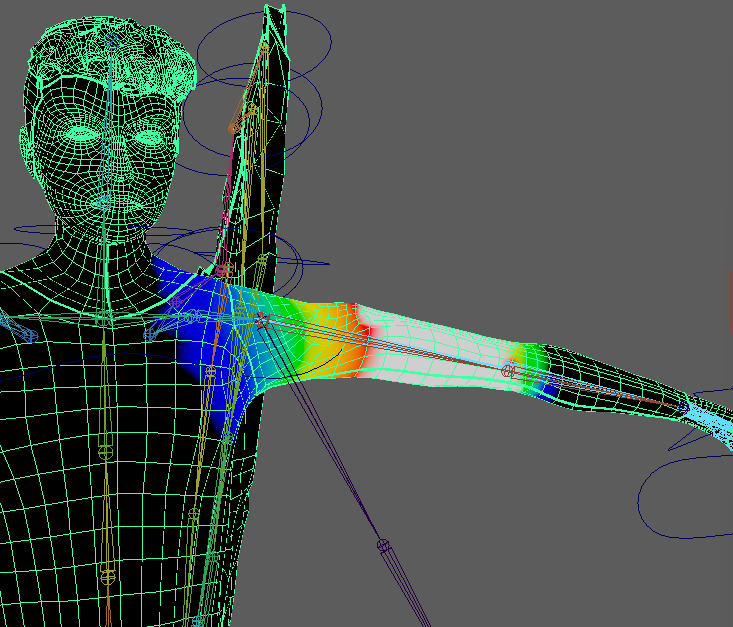
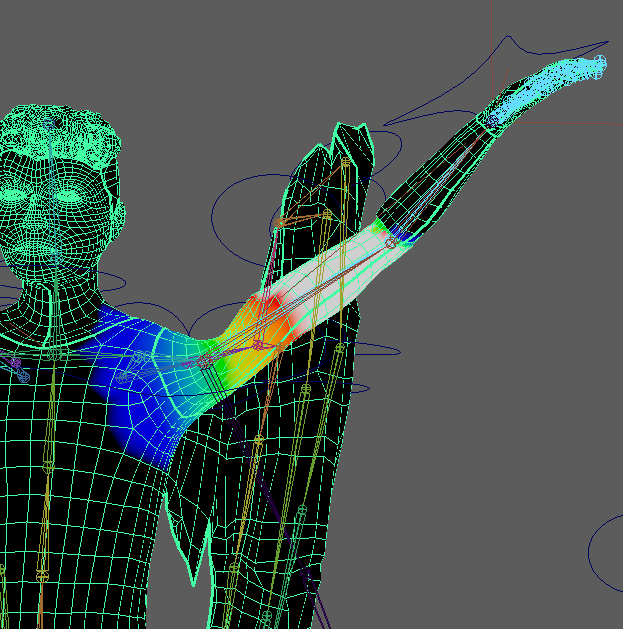
Weight painting
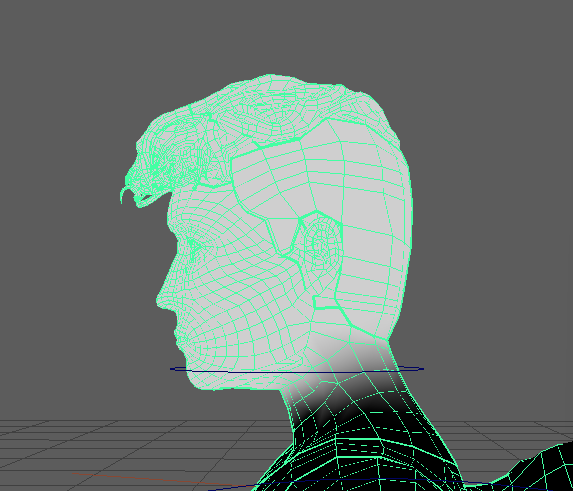
Starting on head

The arm is broken from the new Ik/FK switch being not in the hierarchy right.

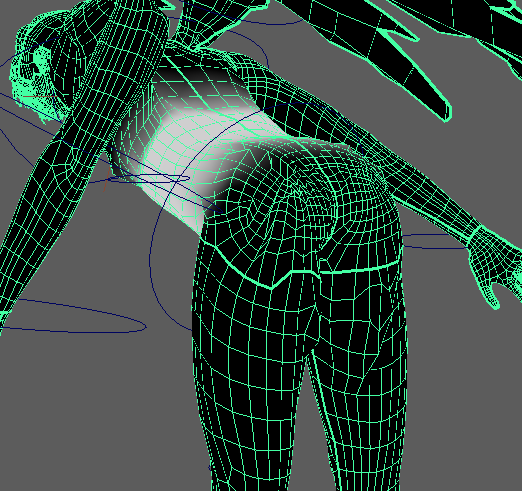
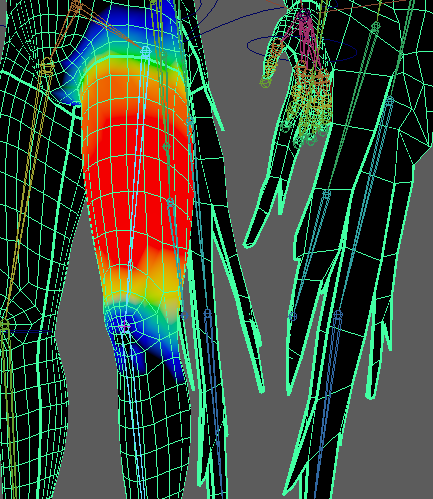
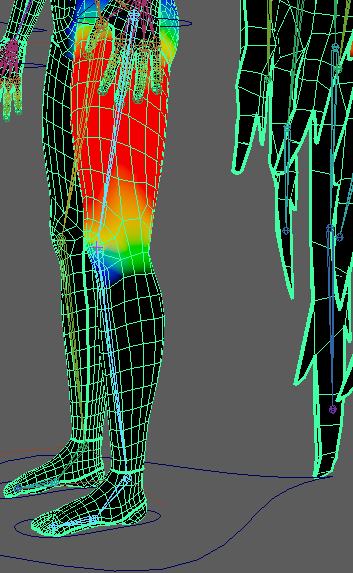
Distortion affecting the butt and thighs even though I can’t see any influence on them.
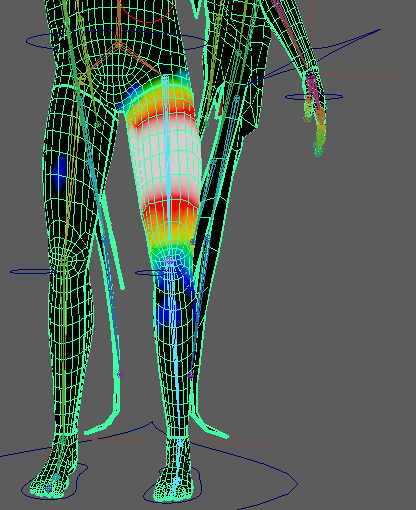
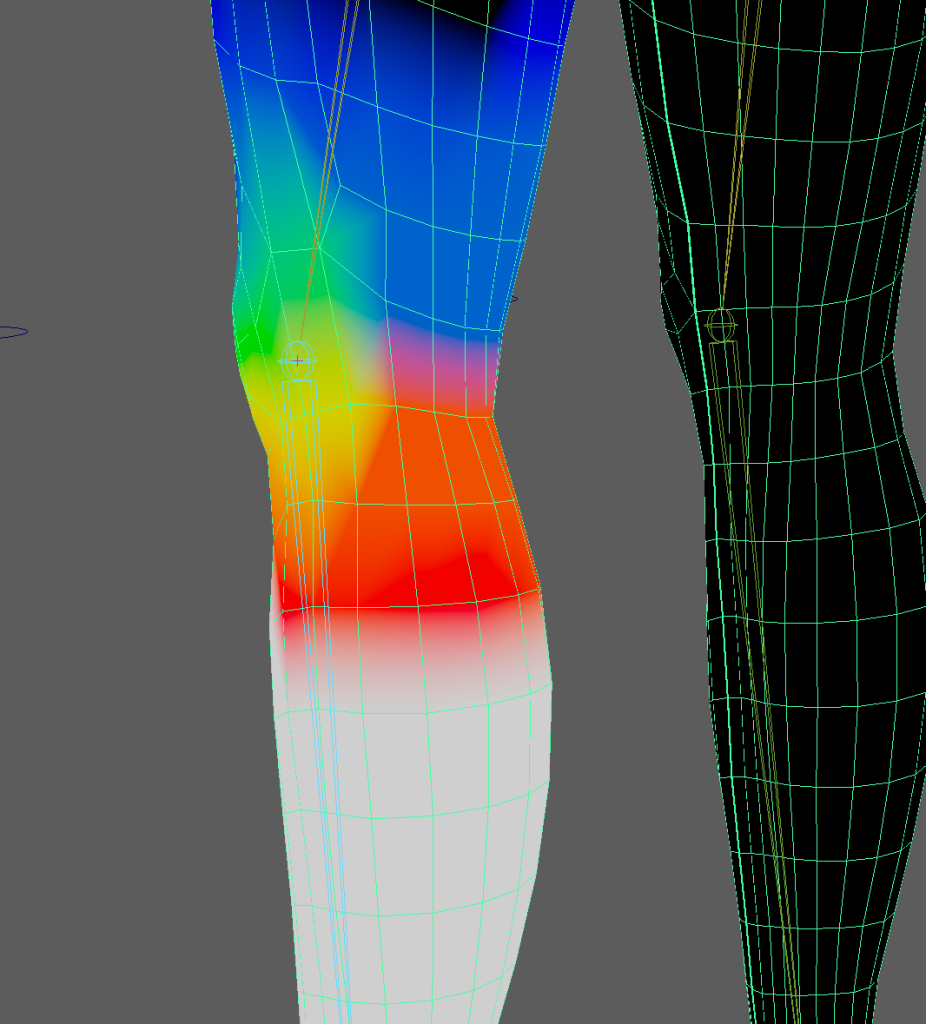
I switched to the colour ramp weight painting because the black and white option can make it hard to see the influence when it’s closer to zero.

needs to be slightly more blended out
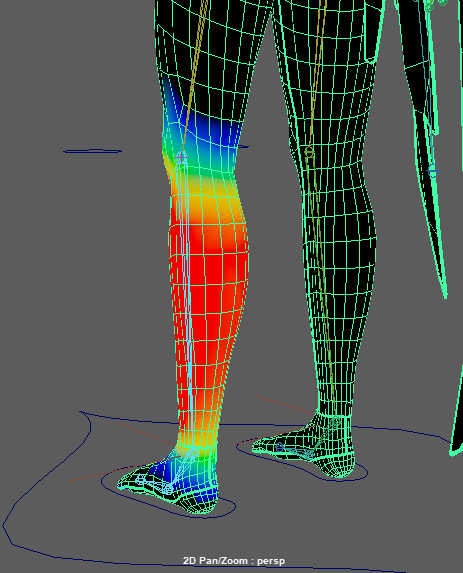
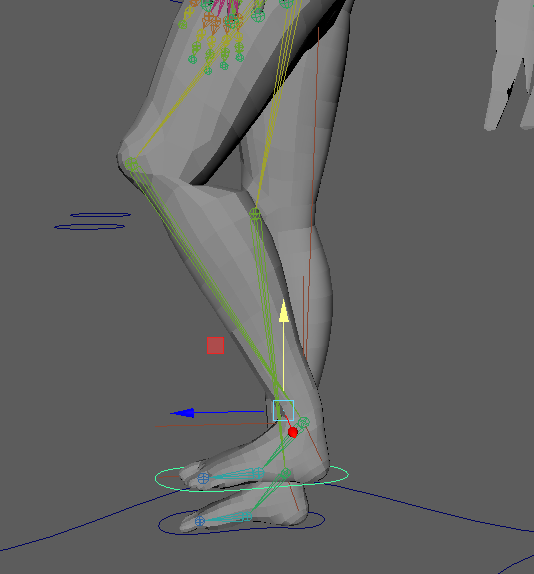

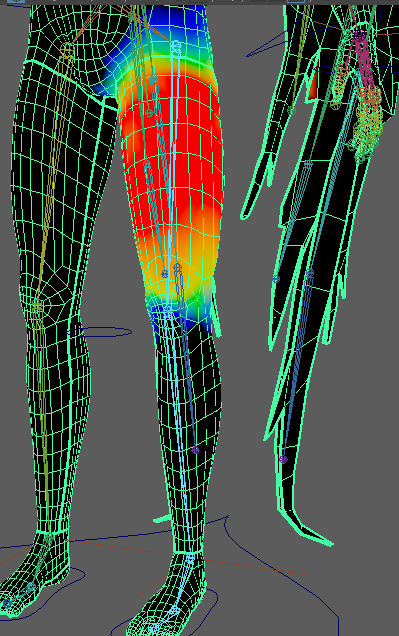
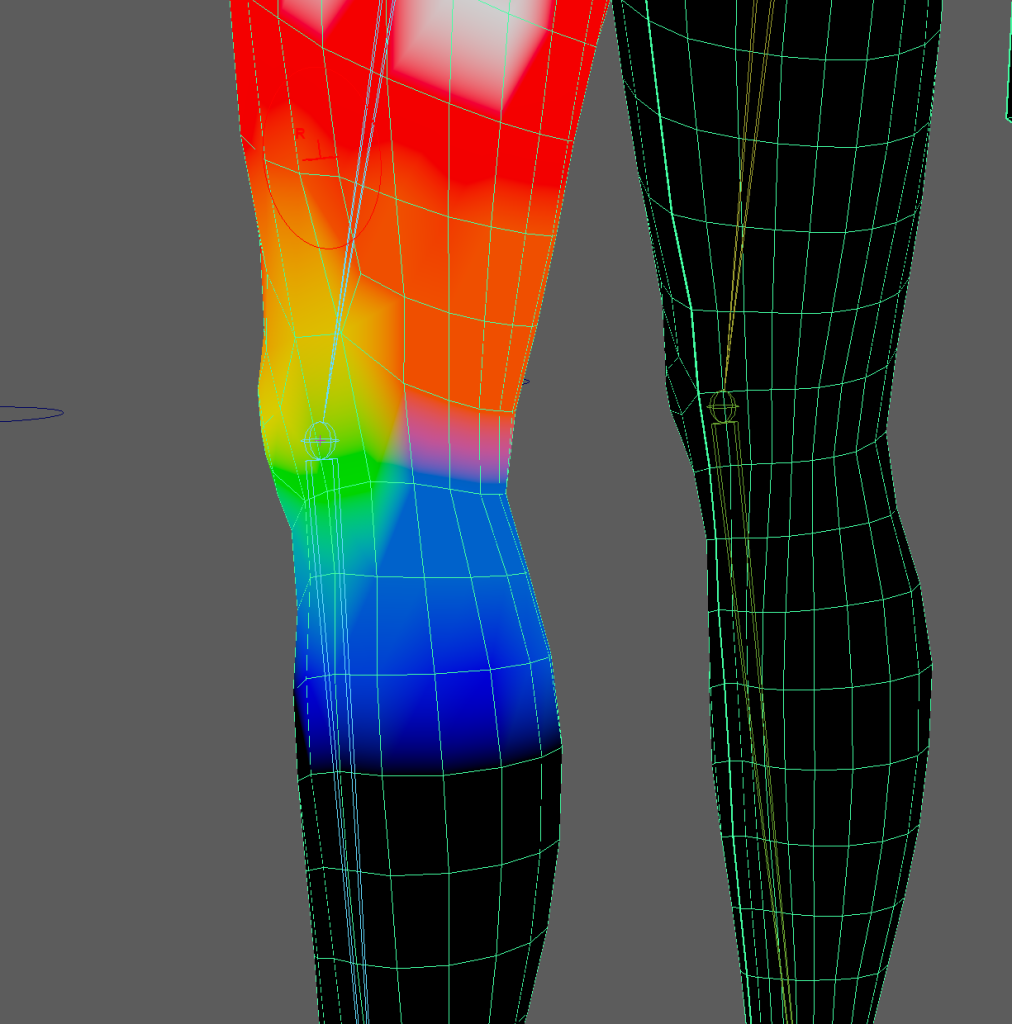
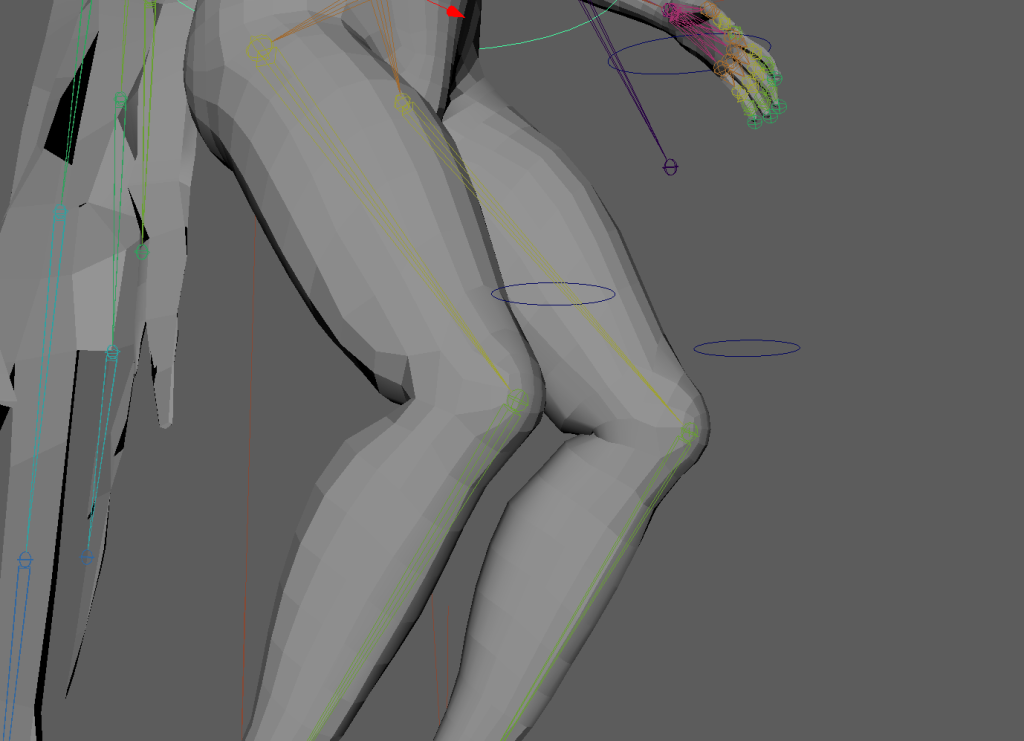
Influence from the thigh bone is too strong as it gets closer to the knee causing it to break the mesh as there isn’t enough of a gradient around the knee.
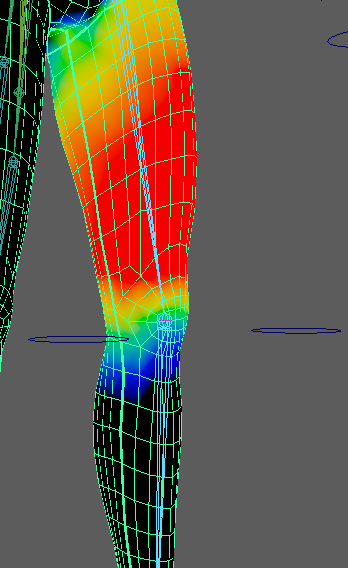
I smoothed the weight painting around the knee.
When I removed some influence above the knee I over-corrected and caused the thigh to cave in above the knee when the leg bent because it was not following the thigh bone enough.
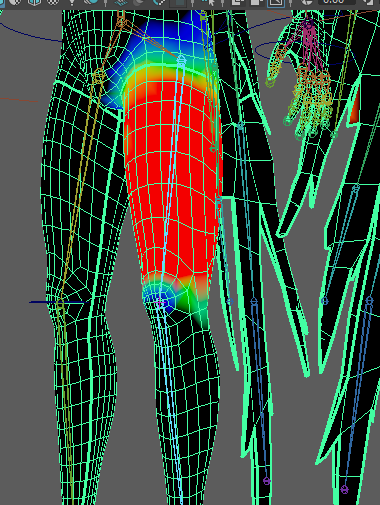
I then over-corrected too far the other way and made the gradient way too sharp causing the mesh to break when the leg bent again.
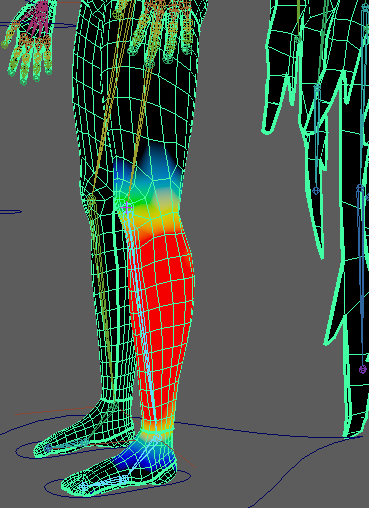
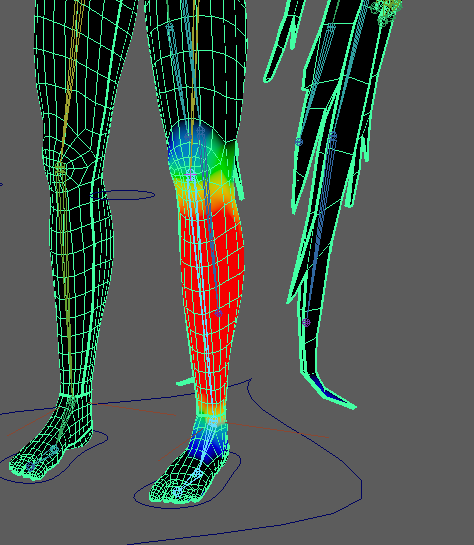
Then I had some issues with there not being enough influence on the knee from the thigh and calf bones which I fixed but it did make the knee bulge outwards when bending.
I keep having influence from bones spread to random spots on the other side of the body.
After looking it up I realised the issues were from maya auto weight painting while using the replace tool so I have to use it set to one instead of a mid range value to prevent the influence being spread to other bones like the hand which was causing the mesh to distort.
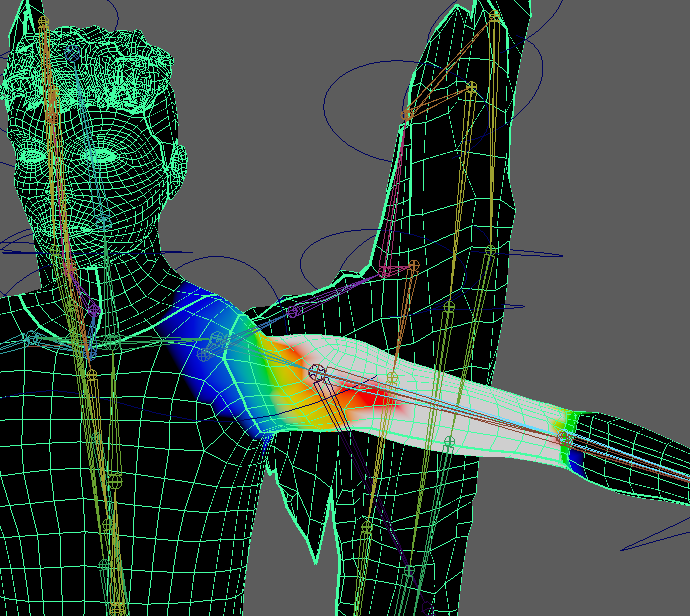
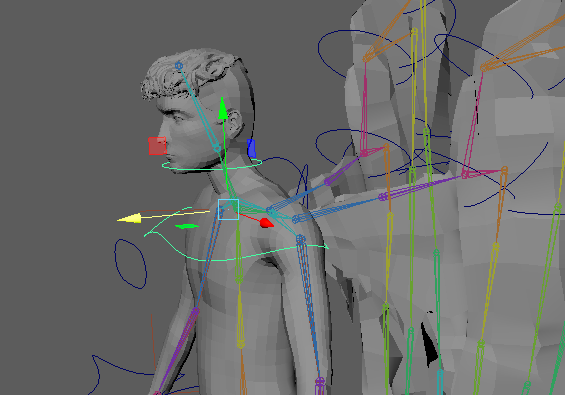
Shoulder does not look great.
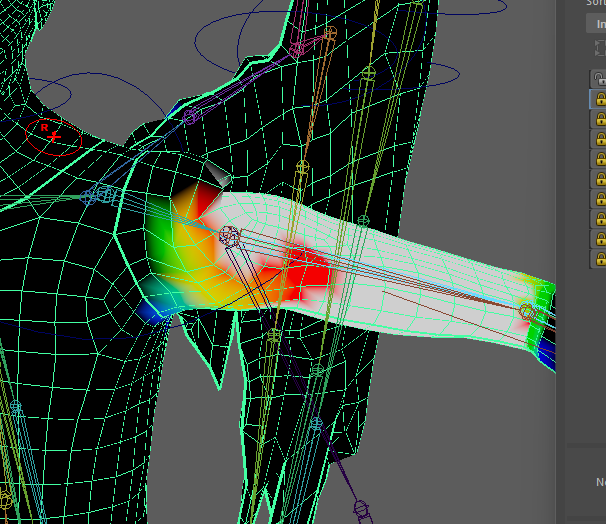
Reduced the influence to make the torso look anatomically correct.
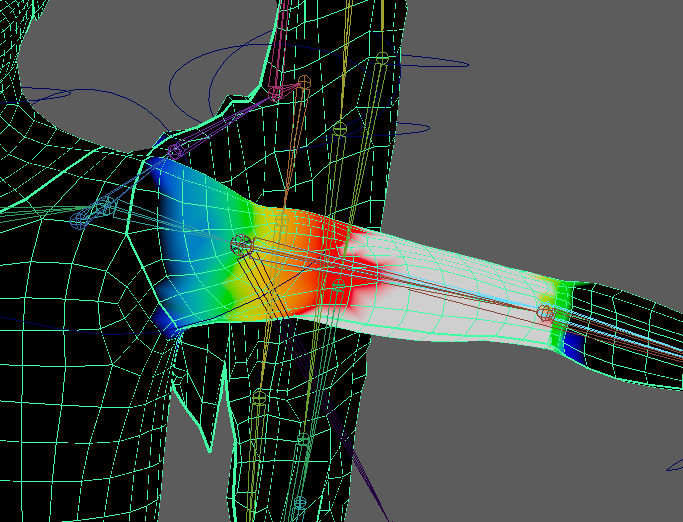
Then smooth to blend with shoulder.
I moved the shoulder joint further into the body and up to prevent this issue.
However moving the bone even after pressing insert to move only the selected joint still affects the elbow joint and breaks the mesh.
To solve this issue I would need to move the bones but as I can’t move them without breaking the arms I will have to either change the animation sequence to avoid moving the shoulder that high or figure out a way to fix it with weighting or move the bones. I contemplated creating the arm bones again without creating the IK FK switch rig and juts using FK to save time but decided to just not move the arms as high in the animation to save time.

I will have to attempt to hide the issues using the camera angles in my animation.
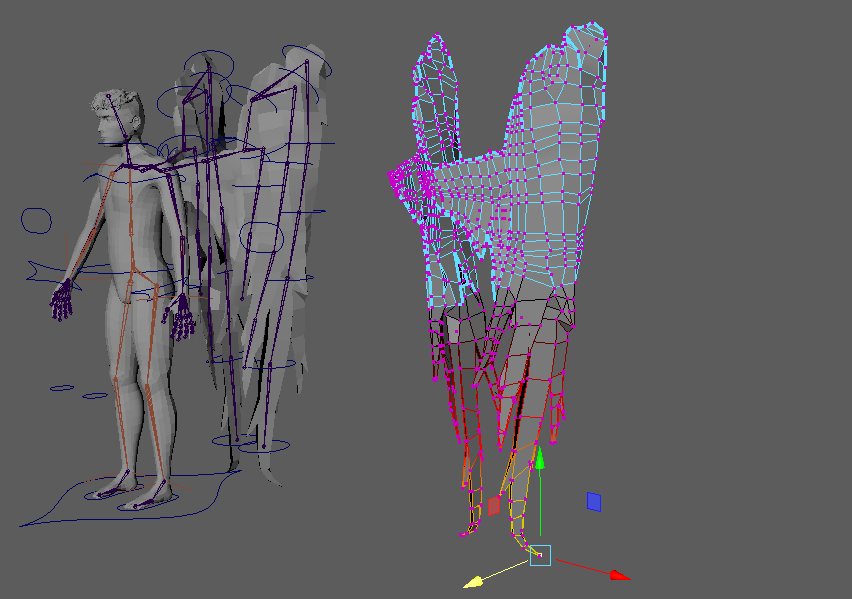
The wings have clipping when extended which doesn’t look great.
But there is not really anything I can do since the issue is with the mesh from the problems I had retopologising the wings because of the sharp edges on the feathers and the gaps between them making it difficult to connect the quads. So I’m going to have to try to make it less noticeable in the video hopefully since the wings have a dark material it will be less obvious.


Smoothed the weight paitning
I thought I had accidentally connected the chest control to the head but realised it was the chest twist control and I forgot to lock the other controls.
I forgot to parent the extra arms created for the IK FK switch to the main skeleton.
Parented them.
I broke the hand mesh by weight painting them while they were clenched so I had to start the hands again with an older file version and paint them while they were open.
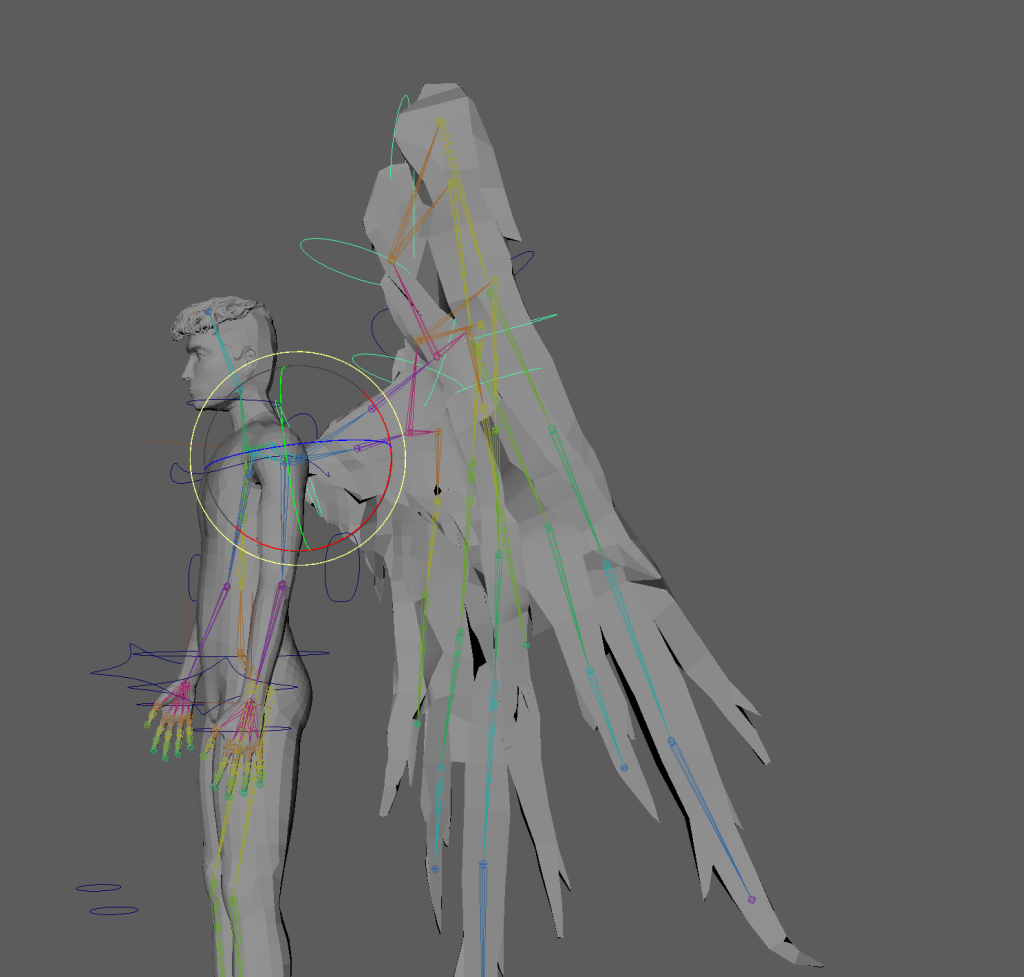
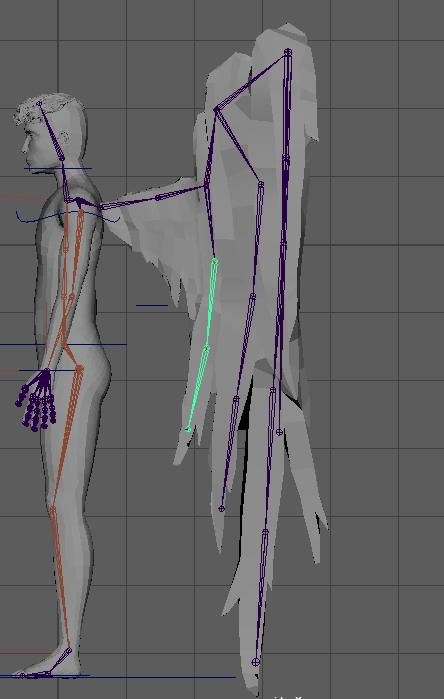
Broken FK controls on the wing must be an issue with the parenting or the constraining.
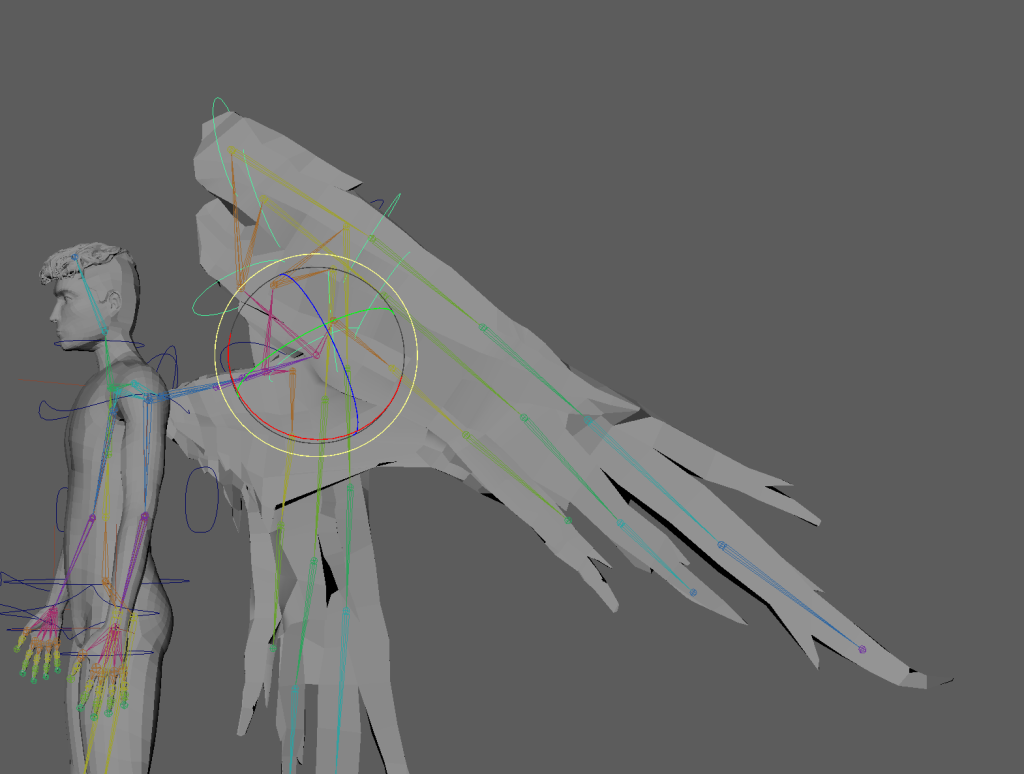
It’s not broken from further down the wing. I tried to parent constrain but it didn’t fix it. I locked the x rotation to stop the controls form moving too far from the bones.
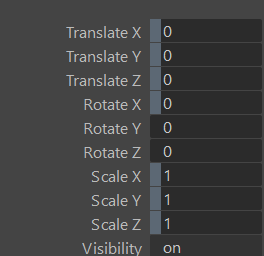
This issue was actually caused by the offset group havign a non-zero scale value.
Rig Demonstration vid
Reflection on rig and weight painting
I had some issues with the model, the way it was retopologised have caused issues in the rig and weight painting on the wings and shoulders. The shoulder could be fixed if I went back and moved the bones but I don’t have enough time for that now. If I were to do this project again I would test the bone placement before adding controls and IK handles to prevent any issues further down the line but since this was my first time rigging a character I didn’t know what to look for and didn’t start weight painting until all my controls were completed.
I would’ve liked to have had some more controls for the spine and shoulders so I could add some hunch and shoulder roll during the animation but I didn’t have time to add them.
I think the weight painting I did isn’t great in some places and the mesh doesn’t always look realistic when it’s moved.
I am happy with my choice to use driven keys for the hands and think I could’ve used them for the wings instead of using basic FK controls but, ignoring the clipping from the bad retopology, I think the wings move fine with the FK controls.
I almost used driven keys for the wings but I think using FK controls will work better for my animations as in my first sequence I want the wings to bend in contact with the ground which would mean I’d need to key the rotation of each joint in multiple directions and would get confusing.
I accidentally had non-zero scale values in the offset on the wing FK controls which caused the controls to distort and not align with the wings when they are moved large amounts but due to time constraints I had to just use them as they are which was only mildly inconvenient.
I think if I were to make a character animation again I would need more practice with weight-painting as it has been the area that I had the most issues with and was slowest to progress through. The only real issue I had with rigging was the bone placement for the shoulders which would not have been an issue if I had had enough time to go back and redo them but unfortunately I didn’t realise until late in the project.
References
Ask A Biologist (2015) Bat Wing Bones [Infographic] Available online: Bat Wing Bones | Ask A Biologist (asu.edu) [Accessed: 14/03/24]
Banks, M. (2016) Maya HAND & Finger Control Tutorial [Video] Available online: Maya HAND & Finger Control Tutorial – YouTube [Accessed: 11/03/24]
Shyamal, L. (n.d.) Wing bones of a bird [Infographic] Available online: Wing Bones of a Bird: The Animal Files [Accessed: 16/03/24]